An embroidery stitch is a gorgeous way to embellish your projects with new dazzling designs. It can be used to create letters, symbols, alphabets, and embroidery patterns on your fabrics as well as other garments. You can even attach two fabrics together with embroidery stitches. When starting to create embroidery stitches, always choose good-quality needles and embroidery threads. Moreover, choose a fabric that is neither too thick nor too thin.
Now, it’s time to discuss the process of starting an embroidery stitch. There are several ways of starting an embroidery stitch that you can follow to create embroidery embellishments on your projects with ease.

Best Guide On How To Start An Embroidery Stitch?
If you’re a beginner and wanna learn embroidery without purchasing an embroidery machine, then collect an embroidery hoop, needle, thread, fabric, and a cutaway stabilizer. As soon as you gathered these supplies, start following the guides below:
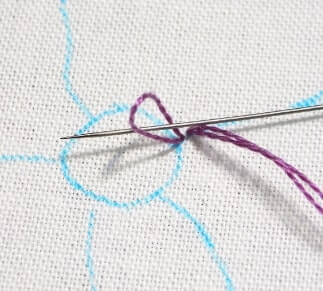
- First of all, thread your embroidery needle with a length of embroidery thread. Tie a knot at the end of the thread after passing the thread into the needle to secure it. However, if you don’t want to keep a knot then make sure to knot the thread at the tail end so that it will leave a 1-2 inch tail when you cut it.
- Choose the area on the fabric where you want to transfer your embroidery pattern. Choose the center of the fabric and mark it with a fabric marker or pin.
- Next, place the embroidery hoop around the fabric and tighten it, as it ensures accurate stitching.
- Now, start stitching your fabric. Once you finish make sure to cut the knot and secure the tail.
Tips On Starting An Embroidery Stitch
- If you’re using a fabric that needs to be washed every 2-3 days, then make sure to tie a knot at the end of the thread to secure the thread. However, using a knot to lighter fabrics isn’t suitable as it makes the fabrics look bumpy and messy.
- If you’re stitching through transparent fabrics or dark color threads, make sure to secure the thread and start stitching with a new spool of thread.
- Use the right tools. Make sure you use needles according to the thickness of the fabric. Also, use good quality embroidery threads.
- Practice, practice, and practice until you get your desired stitches.
Some Basic Embroidery Stitches
There are many different types of embroidery stitches out there, but we’ll only focus on the basic and essential stitches that you’ll most often use while starting sewing your embroidery projects.
Straight Stitch
The straight stitch is easy to create. Simply, just bring your needle up through the fabric and then go back down. These stitches are used to create stars, textures, scattered fills, and more. I don’t think you’ll need much more explanation about the straight stitches.
Stem Stitch
A stem stitch is another basic stitch that is great for stitching smoother outlines. It can be used to fill stitching as well. Like other stitches, you can adjust the width of stem stitches. Just keep your stitch length consistent to create gorgeous designs on your fabrics.
Satin Stitch
A satin stitch is a series of basic stitches used for filling an area without an outline. It is created by sewing basic stitches in parallel lines so closely and evenly. To create a satin stitch, I prefer using 2 strands of threads. But for a smoother finish, I prefer one or three as per necessity.
Running Stitches
The running stitches are basic in hand-sewing and embroidery stitches, usually, the first stitch learned by beginners. They are so easy and also suitable for many embroidery projects.
They are great for sewing two fabrics together or for outlining shapes. These stitches are created by passing the needle in and out of the fabric at a regular distance. They are also used to sew hems, seams, patchwork, and in quilting to hold the layers of fabrics in place.
Backstitch
Backstitch is also known as an outline stitch, stem stitch, or split stitch. These stitches are slightly more advanced than running stitches because of the capability to sew strong seams without using an embroidery machine. They are great for sewing two pieces of fabric together, outline shapes, creating letters, and adding fine details to embroidered pictures.
To create a backstitch, simply start sewing a stitch forward and then come up through the fabric a short distance behind the first stitch. It means after sewing a basic stitch, you’ll have to come backward through the fabric a short distance behind the basic stitch.
Although, it is easy to learn sewing backstitch. You’ll need practice to better create these stitches. In the beginning of your embroidery journey, you must keep your eye firm and work with dedication so that you can learn excellent techniques sooner.
Final Thoughts On How To Start Embroidery Stitch
We’ve discussed several things related to starting an embroidery stitch. Now, it’s time to wrap up! When starting an embroidery stitch, always be mindful to choose the right tools. Once you gather your supplies, simply try to stitch in one direction for neat and clean results.
If you’re a beginner, you don’t need to try all the stitches at once. Stay calm and try all the stitches one after another. Before embroidering get to know the several embroidery stitches and their uses as it will help you to easily decorate your projects.
With a little practice, you’ll be able to stitch most of your projects. And if you keep going, then sooner you’ll be a pro embroidery enthusiast.
We hope you’ll be able to personalize your projects.
Learn More: How To Start Embroidery
Happy Embroidery!